Simple, seamless back longies or shorties. The rise is a little lower in the front. This photo shows a pair of shorts, which fit like board shorts. Depending on the fabric you use these can be hemmed or left unhemmed (knits). These fit great over cloth diapers and disposables alike. The template I use seems to fit about 18-24 months (and for some reason, my four year old also).
These have six seams to sew: the hem on each of the legs (2), the crotch (1), the legs (1), the waistband (1), and sewing the waistband to the pants.
This is my template. The butt seam is on the left and the crotch seam is on the right. To get the seamless back, cut the pattern out with the butt seam on a fold. If you want a butt seam (or don't have a continuous cut of fabric to fold on), these will work just fine too, just remember to sew that seam first. The fabric should be cut with the stretchy part running horizontally. The waistband should be cut in a continuous strip if possible.
This is both pieces cut. Remember to make sure you cut with the stretch in the fabric running horizontally; there's no way to fix it if you don't. If you've cut two separate pieces of fabric, you will have a flat seam that needs to be sewn, and then your fabric should look like this.The leg ends are at the bottom of the photo. These need to be folded up and pinned if you plan on hemming.
If you're using a knit fabric hemming isn't essential as it shouldn't unravel, but it does give a neater edge. I fold the fabric over about 3/4" and pin. The pinning part is important here, to make sure the hem ends up the same width across the leg.

I use the presser foot as my edge guide to sew. Just go from end to end, pulling out the pins as you go.
After you've hemmed one leg, bring the other leg up next to it and fold the fabric over based on the length of the other hem. Pin and sew just like you did for the first leg.

Next you are going to sew the crotch seam. This is the curved part the scissors are pointing to.
Sew all the way around the crotch, making sure to curve with the edge as you get down to the bottom. The fabric is stretchy and will pull a little and should probably be pinned (I can't find my straight pins!).
Once you finish this seam you will have something resembling pants. This is the seamless back.
And this is the front. The fabric should not lay flat for you at this point. Next you are going to sew the legs.

This is a terrible photo, and illustrates how frustrating it can be to sew without pins. To sew the legs you start at one hem and work your way up to the crotch, and then back down again to the other one. One seam, one continuous stitch will sew both legs.

Sew the two edges of the waistband together to form a continuous loop.
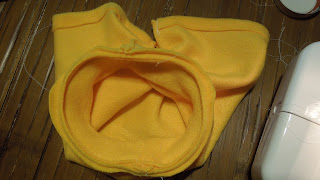
 This is what the waistband should look like after you sew it. Flatten the extra fabric so it will lay flat when you sew. You can trim this, but I think it's less bulky if it's flattened.
Flip the waistband right side out and fold in half, pressing that inner seam against itself so it lays flat. The waistband pieces gets sewn in just like this, right side out.
This part can be a little tricky. Since the back is seamless, it's harder to match up the waistband seam in the middle. I should mark it, but I eyeball it and it always comes out close enough for me. You want the seam in the waistband to be in the back of the pants, since it will show on the finished product. Find the middle of the back of the pants and lay the waistband inside the pants, upside down, so that the cut edges are facing out, just like they are on the pants. Line the seam on the waistband up with the mdidle of the back of the pants, and pin it down. Or, you could be adventurous like I am and tack it down about an inch using the sewing machine. Line up the middle of the front of the waistband with the crotch seam. The waistband will be smaller than the pants waist. This is intentional, and you will stretch the waistband as you sew around.
 Since I can't find my pins, I tacked down the front of the waist to the crotch seam.
Whether you tack down or pin, you will have two sections of waistband that need to be sewn in. Each waistband part is shorter than the pants, so you need to stretch the waistband over the pants as you sew (this is a lot easier than it sounds), so they match up. This will give a snug but not tight waistband that helps keep the pants up and covering the diaper.
This is what your pants should look like after you finish sewing around the waistband. Guess what? You're done! Flip them right side out.


No comments:
Post a Comment